Did you get our “Apocalypse Now” reference?
When you walk into a big project that’s been in progress for awhile (in this case, 350 hours of footage and a previous editor who had been working for a year), the first thing to do is to acquaint yourself with the project. That means checking out all the settings.
Premiere has a lot of different places to adjust the settings. There’s a big Preferences window with lots of tabs, and many of these are quite important. But unfortunately, there are other important settings to adjust and they are not located in these tabs. Huh? Yep. You just have to know to go to them. Let’s start with the obvious, the Preferences window.
The Preferences Window:
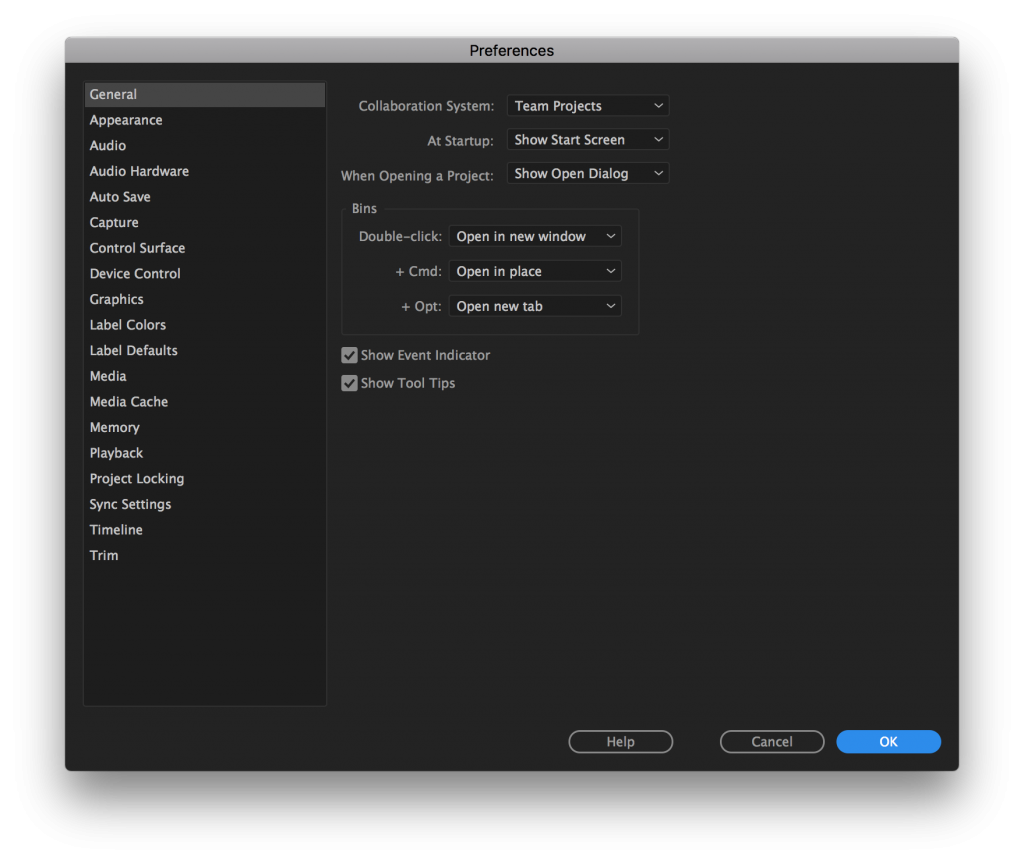 As you can see, there are a lot of tabs in the column on the left. Many of these are only important if you have special hardware attached to your system. In our case, we have an older Power Mac with 2 large RAIDS for media storage. We’re editing 4K footage paired with 1080HD proxies. In other words, a pretty generic setup. So the only important tabs for us are the following:
Audio Preferences
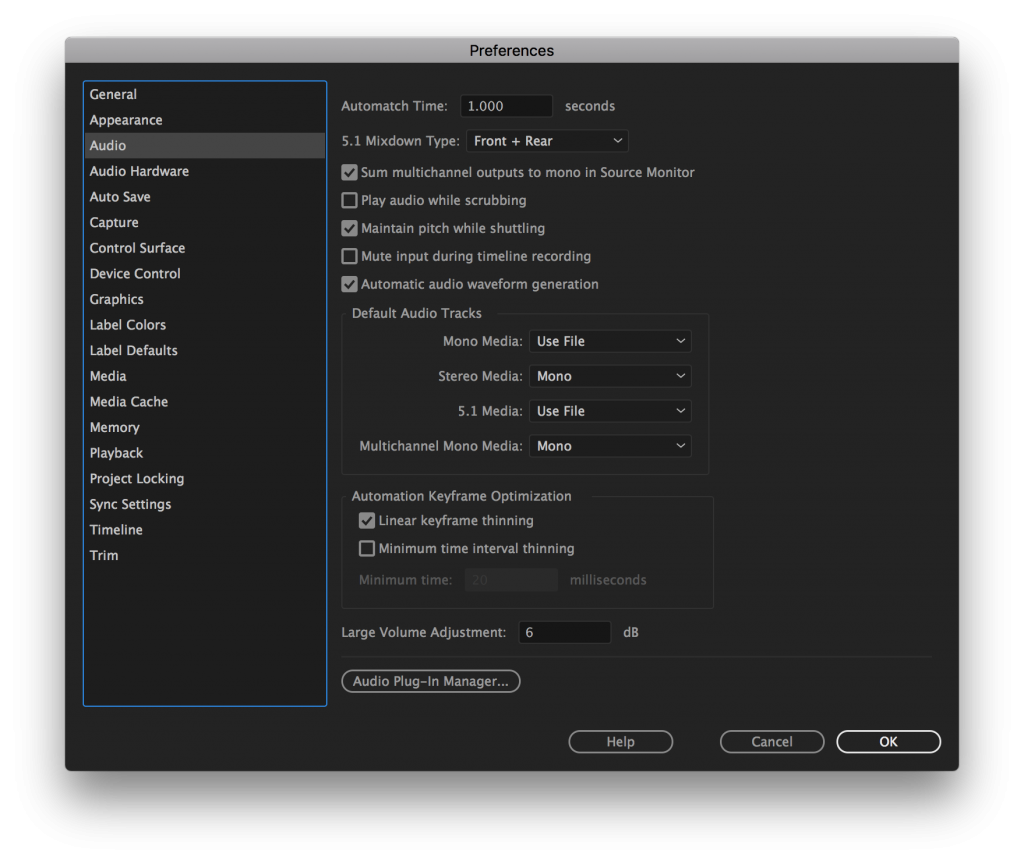
I don’t know about you, but we hate the sound of audio scrubbing. So unless it’s absolutely necessary, we turn it off. We also hate waiting for audio waveforms to generate, so make sure that one’s selected. And this is the place where you tell Premiere the type of audio tracks you want as a default.
Audio in Premiere is a little different than other editing applications in that it offers 4 types of audio tracks: mono, stereo, 5.1 (aka surround sound), and adaptive. The first three should be pretty clear to most editors. (And if not, may we recommend “The Digital Filmmaking Hanbook”?) The fourth option, “adaptive” is unique to Premiere. Basically its a type of “smart” track that can detect whether your source media is mono or stereo and play it back accordingly.
When you set the default audio tracks in this window, you are telling Premiere how to handle audio media when you drop or edit it into a sequence.
Since we are in the early stages of editing this documentary and most of our footage is production audio, we’ll make mono the default. Later when we start adding more music, we’ll probably assign some stereo tracks for music, but we don’t do that here. That happens in the Timeline, or when you create a new sequence, or in the Sequence Settings.
We didn’t include an image of the Audio Hardware preferences, but they are pretty basic. The main thing with this window is that it is the place where you would setup your external speakers or mixer if you have them.
Auto-Save
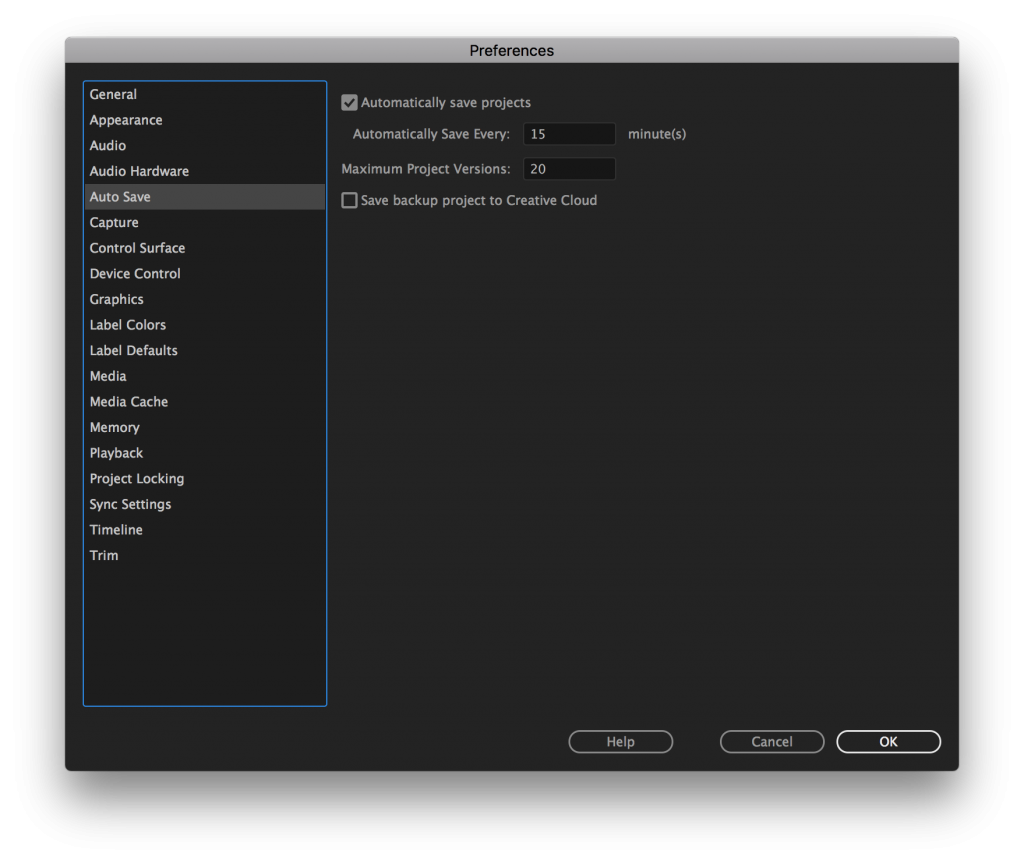
This one’s pretty self-explanatory. You tell it how often to auto-save and how many backups to keep on hand. Be sure to deselect “Save to Creative Cloud” if you have a dedicated project drive and want your backups to be local. You may be wondering why one would want to have project backups saved locally instead of the Creative Cloud. Well, your system might be networked locally, or already part of a remote backup system using another service such as Dropbox. There’s no right or wrong answer here, just that this is where you get to tell Premiere that you don’t want the backups on CC. You might think this would be something you’d set elsewhere, such as the “Media” or “Media Cache” preferences, but it’s not.
One thing to be aware of when it comes to Auto-save in Premiere Pro: Premiere creates a folder of auto-save copies of your project and when you auto-save it ONLY saves to these backups. It does not save the project file you opened. To save that, you have to save it manually yourself. You don’t have to do this, but if Premiere crashes and you think everything is okay because you’ve got autosave turned on, but then when you relaunch your project, you find it is unchanged since you started work that day, that’s why. Your work is indeed backed up, but it’s in the auto-save folder that you designated in this preferences window. It’s functional but slightly awkward.
Media Preferences
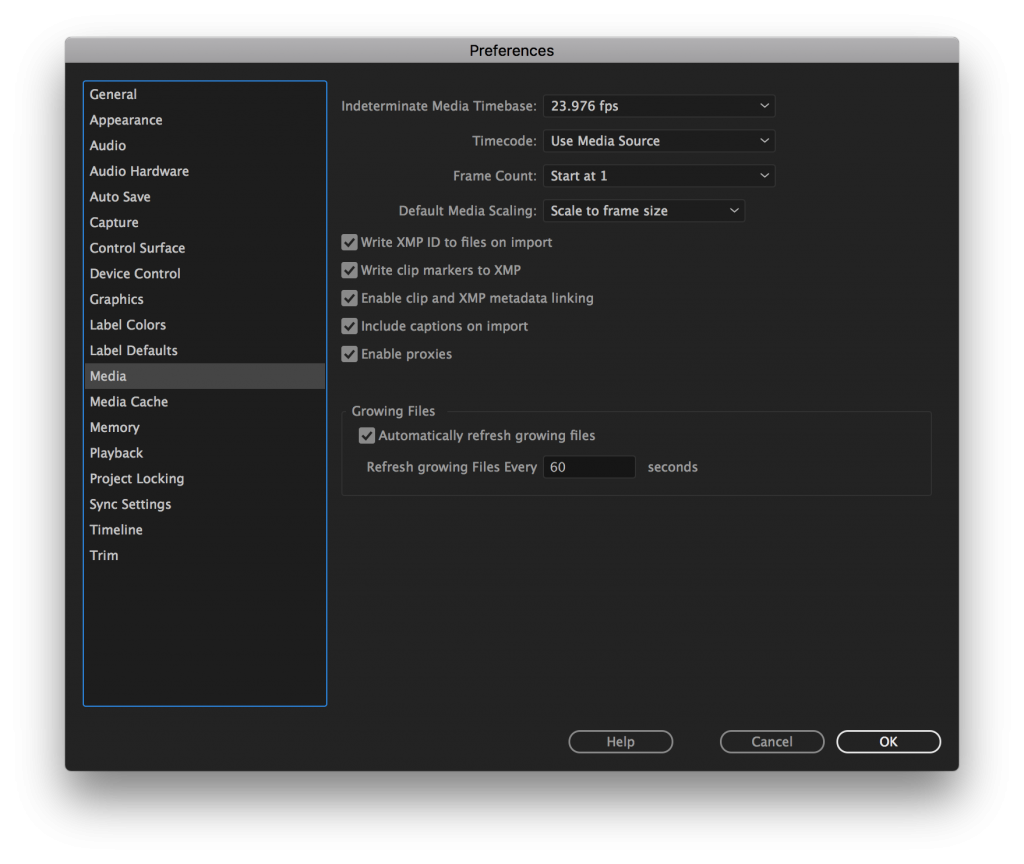
The media preferences are important but pretty basic. If you’re editing a project in the U.S., your timebase is probably gonna be 23.976 fps. And if it’s a professional project, it will have timecode so you’ll want to select “Use Media Source.” Also important in this window is the “Enable Proxies” checkbox. We haven’t been using Premiere long enough to know how “Default Media Scaling” affects performance. But since play performance on Premiere isn’t always that great, I’m guessing that its best to avoid scaling, so we set it to “None” for now.
Media Cache
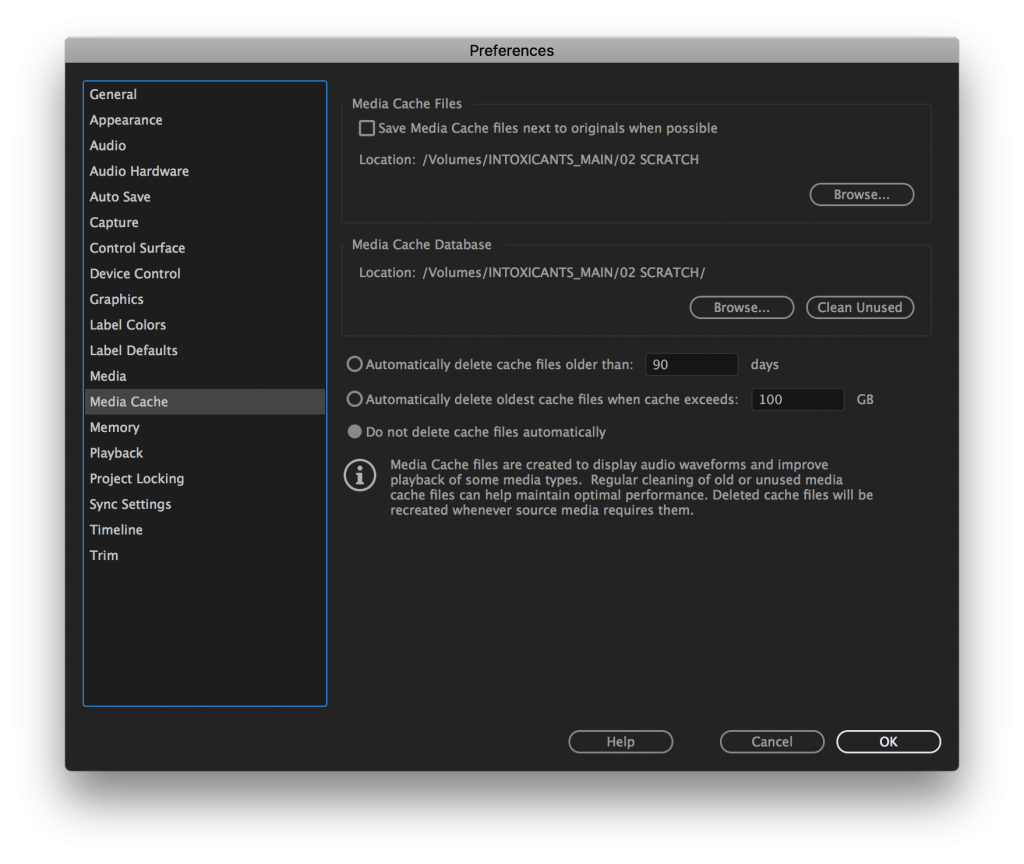
Editors like control and the Media Cache preferences window is the place where you control where your files are stored. Adobe Premiere has the default of saving everything next to the project file, which typically means on the hard drive of your computer. For a smaller project, this is probably fine. But most feature films will have dedicated media drives. So in that case, you’ll want to deselect “Save Media Cache files next to originals when possible.” Instead, you should create a special folder for your media cache and tell premiere to save the cache there.
What exactly is the Media Cache, you may ask. Premiere doesn’t just play your media files. It needs to make extra files in order to playback properly and also to allow you to view thumbnails and waveforms of audio. These files go in the Media Cache and Premiere keeps track of them using the Media Cache Database.
Another good reason to keep these files separate from your other media files is that the media cache fils and the cache database are known to get corrupted during long term projects with lots of media. One part of system maintenance is to delete and rebuild the cache and it’s easier to do this if it’s in its own folder.
Timeline Preferences
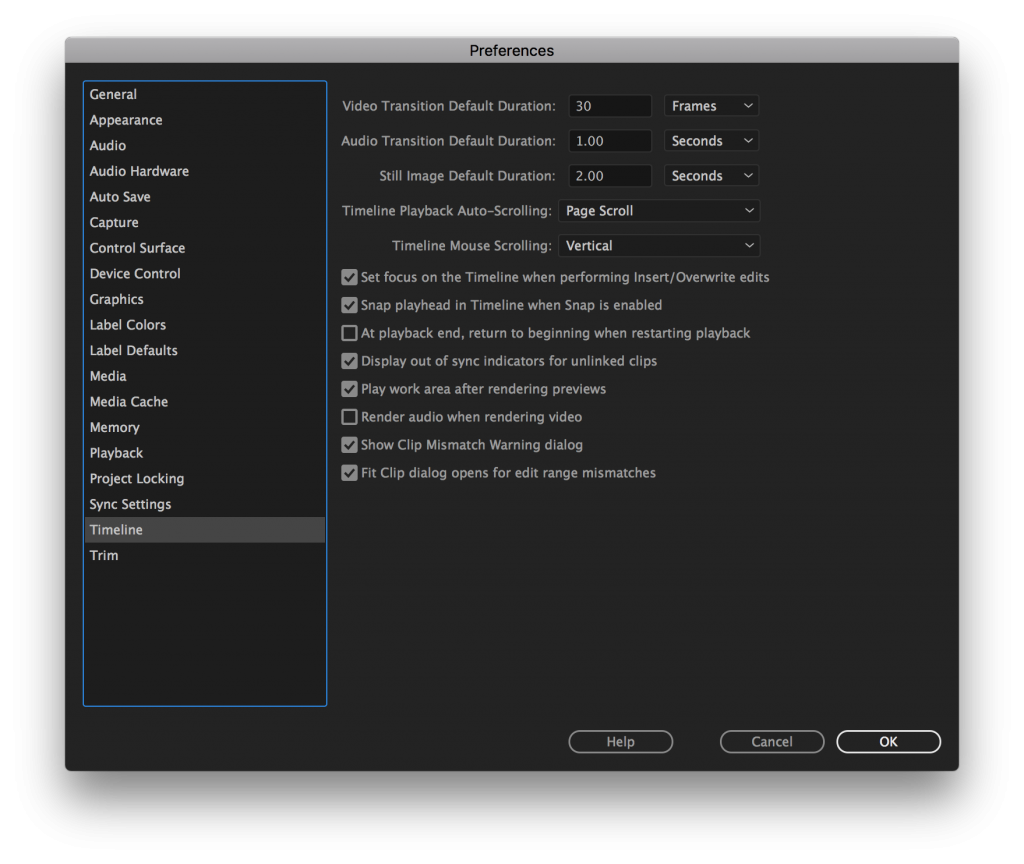
The timeline preferences are pretty basic and everyone will have different preferences. I, for one, hate it when Premiere auto-replays my sequence when it gets to the end. So that one is unchecked.
So that’s it for the Premiere Pro preferences. But there quite a few other places to set Settings within the app: Sequence settings, Project settings and Tools (or whatever it is they call that menu under the wrench icon, since there is also a separate Tool palette.) We’ll go over those in the next blog post because this one’s getting too long!
Oh, and just in case you were wondering, the quote from Apocalypse Now is “The horror! The horror!”